Building A Rock Star Tundra – A Little Chrome and a Lot Of Sound
Jason Lancaster | Jul 16, 2010 | Comments 12
This is the third post in a series about the Rock Star Tundra build-out. Be sure to check out the first post and the second post if you haven’t seen them already.
After a brief hiatus, it’s back to work telling the story about Chris’s rock star Tundra Crew. This week: a little chrome, and a whole lot of stereo equipment.
Follow along as we break down a comprehensive high-end sound system installation in a 2010 Tundra crew that puts the “rock” in Rock Star.
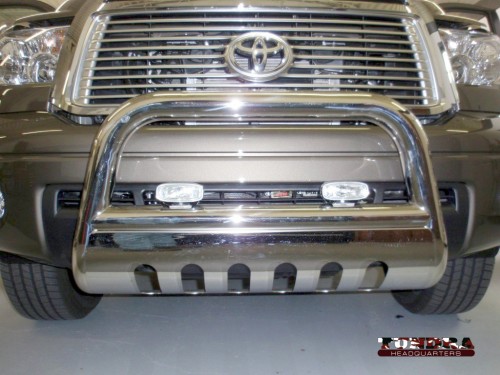
First, let’s get a couple of “details” out of the way. Chris’s ride has a touch of chrome – a Steelcraft bull bar up front and some 5″ Raptor oval stainless steel sidesteps.
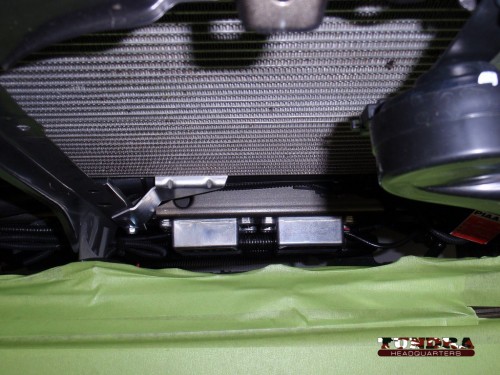
You’ll note that there are a set of HID driving lights mounted on this bull bar. The ballasts for these lights were installed just behind the grill, just below the radiator. This helps to ensure they stay cool without effecting the supercharger’s intercooler, transmission cooler, or radiator.
While Chris is perfectly content with the Steelcraft bull bar, the Raptor side steps are a little disappointing in one area. Rather than using all of the Tundra’s factory-drilled side step mounting points, the Raptor steps only utilize 3 or the 4 sets of pre-drilled holes. Even worse, the side step brackets don’t allow for two bolts…just one.
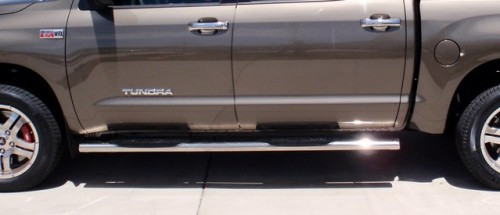
The Raptor 5" steel steps have solid steel end caps, but a less-than-perfect mounting system
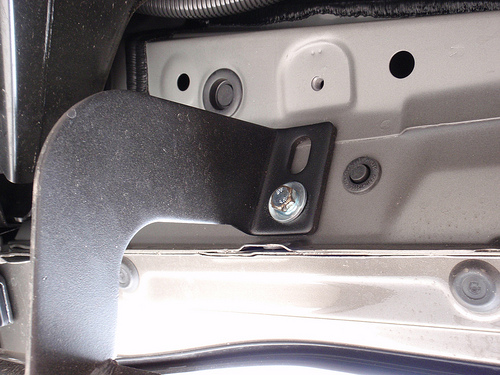
You can see how the bracket can't possibly take advantage of both of the Tundra's pre-drilled mounting points.
Chris says that the quality of the step is top-notch, and unlike most of their competitors, they actually weld a piece of solid steel onto each end of the bar. This is arguably superior to using a plastic cap that might allow moisture to enter the tube and eventually cause rust. Chris also likes the size of the – the step surface is quite good. His quote – “why go 99% of the way and fumble the ball?” with a half-done set of mounting brackets.
Custom High-End Stereo Explosion
The vast majority of factory or “stock” stereo systems are handicapped by a combination of low power, middle of the road quality, and a fairly loud “box” to play in. This isn’t to say that a standard stereo is bad…it’s just not nearly as good as a mid-range home stereo. If you’ve become accustomed to pristine sound quality (and Chris has), then you might want to check out all the mods that have been made to this Tundra.
First off, it’s important to remember that a stereo is only as good as the room it’s placed in. A vehicle, for example, has a lot of sound “leaking” in from the engine, exhaust, tires, and suspension. This so-called “road noise” can mask the fidelity of a truly excellent sound system, so step one in any high-end stereo install is to place some serious sound deadening material in the floor, doors, and roof.
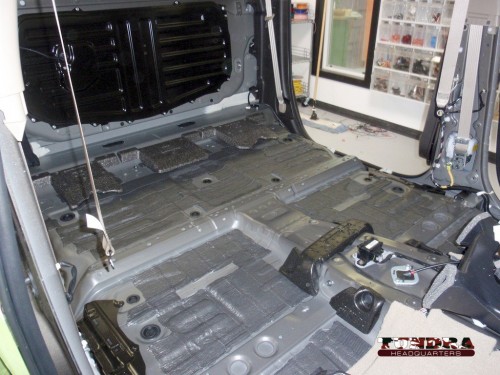
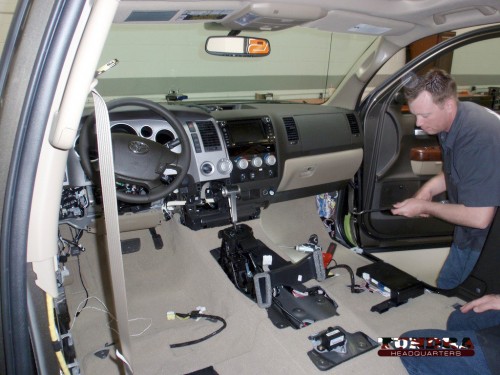
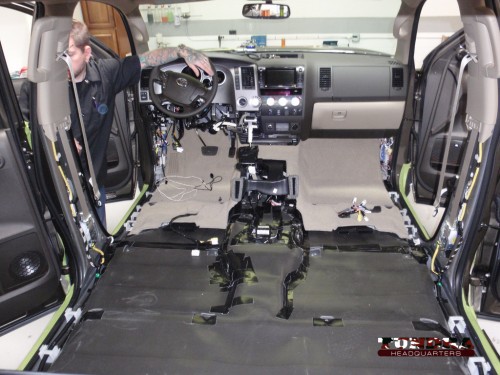
With the seats and carpet removed, this is what a 2010 Tundra crew looks like. Note the light-grey factory sound-deadening material.
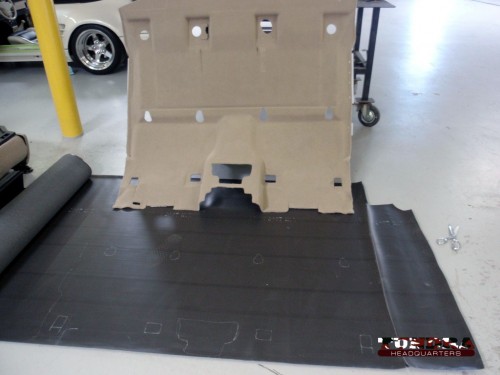
The carpet, once removed, is used to make a template for the sound deadening material
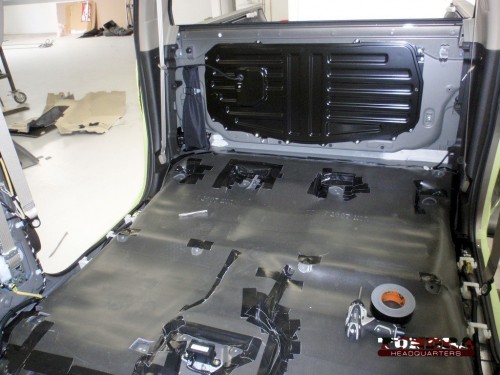
As you can see, the new sound deadening material is thicker and coverage is more complete than the factory-installed material.
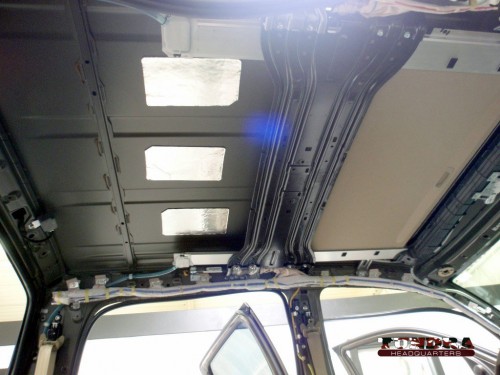
With the headliner removed, you can see the silver "panels" of sound deadening installed by Toyota. Obviously, that's not enough material for this truck.
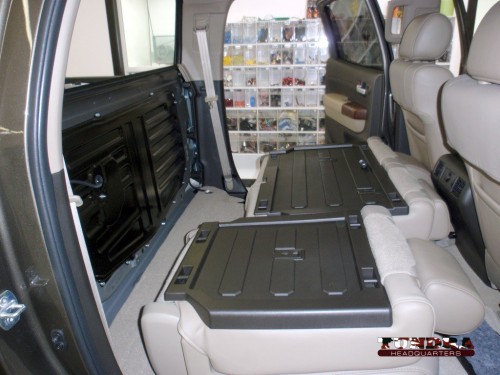
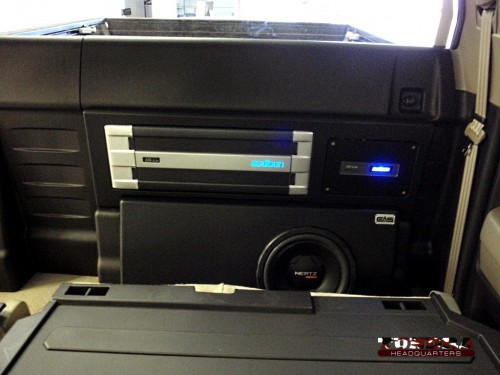
Sound deadening materials also help to eliminate vibrations, which is a good thing when you install a powerful subwoofer in a custom enclosure. Here’s the before and after of this Tundra’s rear-mounted sub:
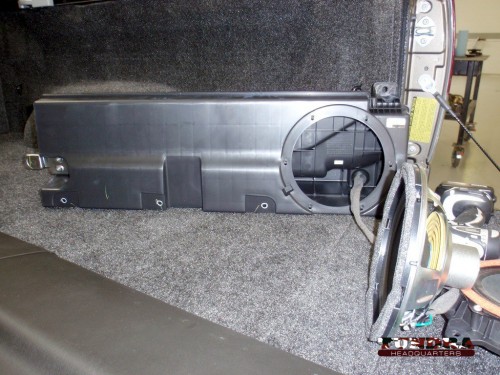
Here's the stock Tundra subwoofer taken out of the factory enclosure. Chris says "I've seen bigger magnets holding school papers on a refrigerator!"
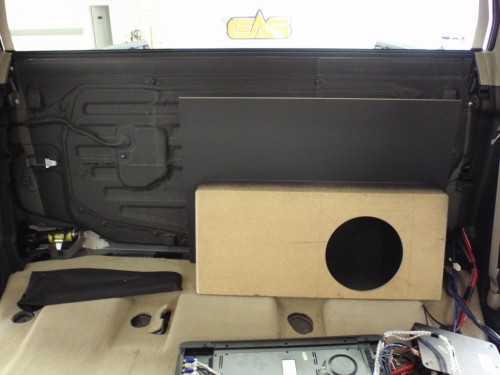
This custom subwoofer enclosure allows for a bigger sub, an Audison amp, and it's sprayed with a special sound-deadening paint too.
With the subwoofer installed (along with new speakers in the front doors) and this 1500+ Watt Audison amp, it’s time to tie everything together. Like many new vehicle buyers, Chris wanted to invest in a high quality after-market stereo, but he didn’t want to throw away a very nicely integrated factory navigation unit. The trouble is, most factory head units simply can’t provide the wattage or number of outputs needed to power a quality after-market sound system.
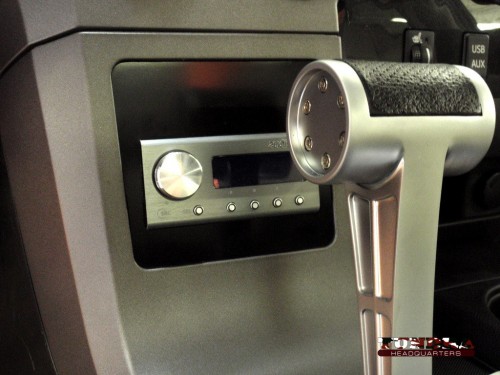
The solution? Use a digital signal processor (DSP) to interface the factory stereo with the after-market system. Chris’s truck uses the Audison Bit One Processor, and incredible little piece of technology that allows for a tremendous range of sound tuning. This DSP is programmable via personal computer (you can read an interesting review of it here) and it has the ability to very specifically direct frequencies to each speaker, eliminate sound clipping at even the highest volumes, and then of course do everything any equalizer or digital audio unit can accomplish. In short, it is the brain of the system…and it gets a very nice install in the dash, just in front of the shifter.
What does it all add up to? Arguably one of the best sound systems ever installed in a new truck. Chris said that “now I’ll hear what Stevie Ray Vaughn is supposed to sound like.”
Sounds good (pun intended).
Finally, Chris would like to give his thanks to the company that installed this system. EAS – Elite Audio Solutions of Colorado Springs, Colorado – did a tremendous job fawning over the details of this truck. Not only did they carefully install a lot of stereo equipment, they also added a Clifford 590.2X alarm system, and they installed the HID headlights on the bull bar.
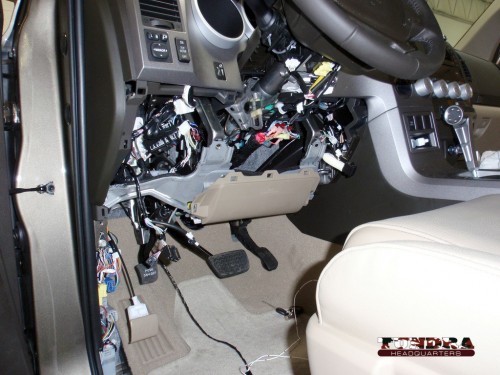
Installing the Clifford 590.2X alarm system. Includes a 1-mile transmitter, remote start, and self destruct button.
EAS was so incredibly concerned about details that they taped up the bull bar while installing the lights just so they could avoid scratching the chrome. THAT is the kind of work you want from your after-market installers. EAS has also invited Chris to come back for a “re-tuning” of his system as part of his purchase. If you live in Colorado – or you don’t mind making the drive – it definitely sounds like EAS is worth the trip.
Click to see some larger photos of the EAS shop and fabrication area.
In the final post on this Rock Star Tundra, we’ll recap all the mods and show off the finished truck. Stay tuned!
Filed Under: Featured Vehicles


Sweeeet! Nice job Chris. Can’t wait to see the finished product.
Jason and the incredible amount of information here helped me greatly throughout my build of this truck. I feel I owe him a great deal for all the sweat and time I would have wasted stumbling around for myself – Which is the sole reason I tried to return the favor by handing over everything I did.
I do hope everyone benefits from this knowledge in way or another.
Chris – Your contributions are very much appreciated…and the truck is awesome. Kudos to you for having a vision and putting the time, effort, energy, and resources into creating something special.
To everyone – Please remember that the comment moderation rules on featured truck posts are different. If you can’t say anything nice, just don’t say anything at all.
Thanks.
excellent upgrade, currently researching options for scrapping the rather “uninspired” Toyota factory system that came on my new Tundra. It is crap. I wasn’t considering adding sound deadening material before I read your post, but now I am. Especially since I am putting a sub in somewhere. Looking through the truck it seems like an ideal place for a sub would be right in the bottom of the center console. firing rearward.
Jason – Let us know how it goes man – I’d like to see that install too.
Very nice! I just bought a 2010 dbl cab and would love to know if I have a factory sub installed behind the rear seat?
Chris – Do you see it? The factory sub enclosure is visible, and in the same location as the after-market sub shown in the images above.
[…] Anyone replaced subwoofer speaker with aftermarket? Building A Rock Star Tundra – A Little Chrome and a Lot Of Sound | Tundra Headquarters about half way down the […]
Hi Jason,
I know this is an old post. Just wanted to know what this system cost?
The Audison is incredible. Install is clean. I have a bunch of gear from my last 2 Tundras that I want to install in my ’12 and this post gave me some ideas.
What was the output from the alternator (stock amps)? Was there noise in system? Etc.
I have the Raptor bars too, nice they don’t line up to stock holes.
Thanks!
Rick – No idea on most of these questions…the alternator output is 170amps if you have a tow package. Since most trucks have that tow package, I think 170amps is the rating.
Now, in terms of max draw, I’m not sure you’ll get to that figure. I’d probably budget for 150amps when I’m picking out equipment.
Of course, you can always purchase a bigger alternator if you need more current. 🙂
[…] sound isolation so i'll reap the benefit of a much quieter cabin. Here is a good article on same: Building A Rock Star Tundra – A Little Chrome and a Lot Of Sound | Tundra Headquarters Blog IF you can't or don't wanna do the install, try Best Buy or some reliable local shop to do the […]
Jason,
When I saw how little insulation our trucks have, especially in the ceiling (via the pics in this thread), I wasn’t surprised. The summers here can get hot and I can feel the heat coming through the roof! A complete assessment and install of insulation would help a lot not only with outside noise but with heat isolation. I plan to look into it. I’m trying to find a thin, closed-cell foam product for the roof that won’t interfere with the sunroof or the ceiling panel and adhere permanently. The interior dismantling looks formidable though. thanks for the informative article!